de_DE en_GB it_IT pl_PL

furniture industry

Measurement and inspection of furniture parts

HECHT measuring systems are designed for the measurement and inspection of furniture parts. Our solutions can be used both offline and online.

The possible applications in furniture production are very diverse – from incoming goods inspection for purchased parts to setup time reduction on drilling lines, quality control in batch size 1 production, part identification after painting, random sample measurements and outgoing goods inspection. With a HECHT measuring system you will find the right solution within your furniture parts production.

Our vision

Faultless parts for all furniture manufacturers.

Due to our decades of experience in the development of measuring systems for furniture production, we as industry specialists know your requirements and general conditions very well. The processes in a modern furniture production are extremely diverse and individually designed for each manufacturer.

Through numerous installations worldwide, we have been able to gather an enormous wealth of diverse experience.

We are happy to bring this experience to you as well. Please contact us to support you.


Incoming inspection carcase parts

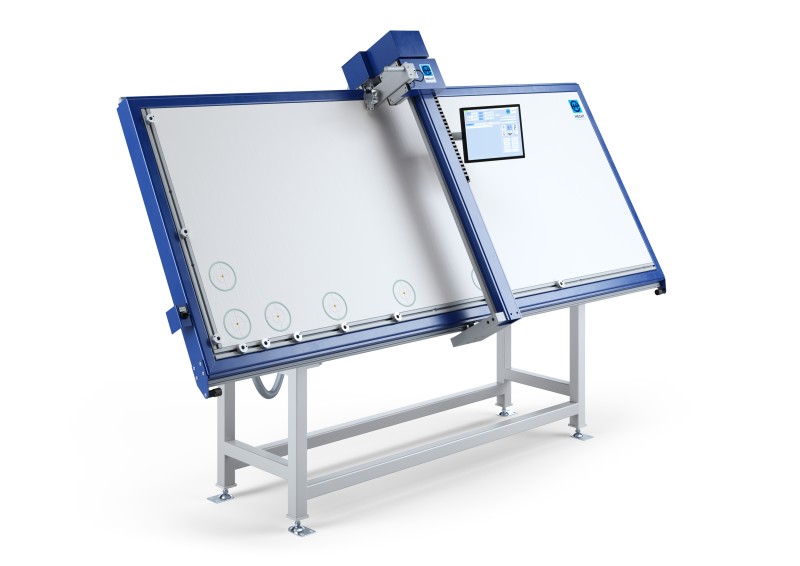
Sample measurement with OptoDesQ Vmax

Are you familiar with it too: When assembling the carcase, it is found that the panel back panels do not fit. The inspection reveals that the grooves of the back panels on the delivered carcase parts do not match the dimensional tolerances in the drawings.

Annoying, because now the assembly is stalled, the entire production is disrupted and the delivery date to the customer is in great danger. How can this be, why are we processing these parts, why has nobody noticed this yet.

In this situation, one asks oneself many questions. Continuous cooperation in the area of quality assurance with suppliers is enormously important in order to be able to guarantee stable production processes.

With random sample measurements in the incoming goods department, an agreed number of parts can be measured. The measurement data is stored in a database. If parts are found with deviations from the agreed dimensional tolerances, the supplier can be informed immediately. In this way, good parts can be delivered at short notice and production can run according to plan and in a stable manner. The measured values in the database are regularly evaluated and discussed with the suppliers. In this way, trends can be identified and, for example, the best time for tool changes can be easily recognized on the basis of curve progressions of the data. This enables targeted cooperation with the supplier and all sides benefit enormously. With the HECHT OptoDesQ Vmax, this is already implemented today.

Measurement of kitchen countertops

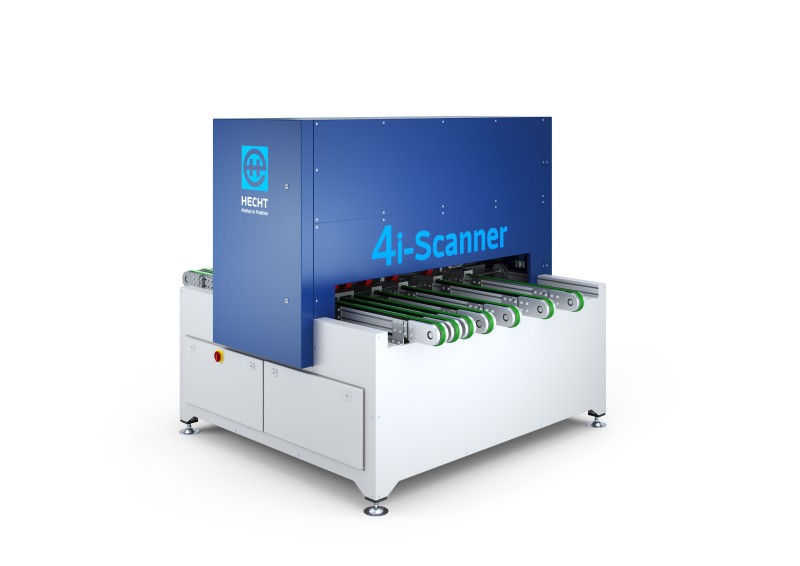
100 % throughput measurement with 4i inline scanner.

Kitchen countertops are usually manufactured on a commission basis. The dimensions are specified by the customer. Various influencers regularly lead to complaints and discussions about the reason and justification for the complaint.

A measurement protocol of every delivered countertop would end many discussions, as the dimensional accuracy could be proven upon delivery. In this way, several things can be optimized and improved at once. Costs are reduced, processes optimized and complaints due to dimensions can be avoided. If a worktop does not have the correct dimensions when measured, the cause of the error can be investigated immediately. In this way, the source of the error can be eliminated and the faulty worktops can be reproduced. Your customer receives his kitchen on the desired date - without complaints about the dimensions. If there are any discussions about the dimensional accuracy of the countertop, the measurement record can be used to prove that the countertop was in order at the time of delivery.

Set-up time reduction series production

Set up faster – increase productivity with Opto DesQ Vmax

How often do you set up your drilling machine per shift? How do you go about it? Do you do it the way most people do it? Do you set up the drill press, make and measure a part, readjust the drill press, start a production batch and readjust a part again?

Measuring with tape measures, calipers, gauges and other tools is often tedious, time consuming and error prone. While the part is being inspected, the entire drill line is at a standstill. For large parts with many holes, measuring can take many minutes. After measuring, the machine operator must match the holes to the individual drills and readjust the machine settings. This also takes a lot of time and always leads to human error. Do you also ask yourself if measuring could not be done faster? What tools could be used? How can you find out faster how the drill needs to be readjusted - which supports, drill heads, spindle?

With a measuring table that can process the data from the drill, you can do just that. The operator gets a graphical representation of how to readjust the drill. Measuring the workpiece is much faster and more accurate, and readjusting the drilling machine becomes much easier. What if you could save an average of about 5 minutes per setup process, with far fewer human error sources and, at the same time, complete documentation of all measured values in a database? And on top of that, you would achieve an overall improvement in quality. Doesn't that sound good?

Picking of painted parts

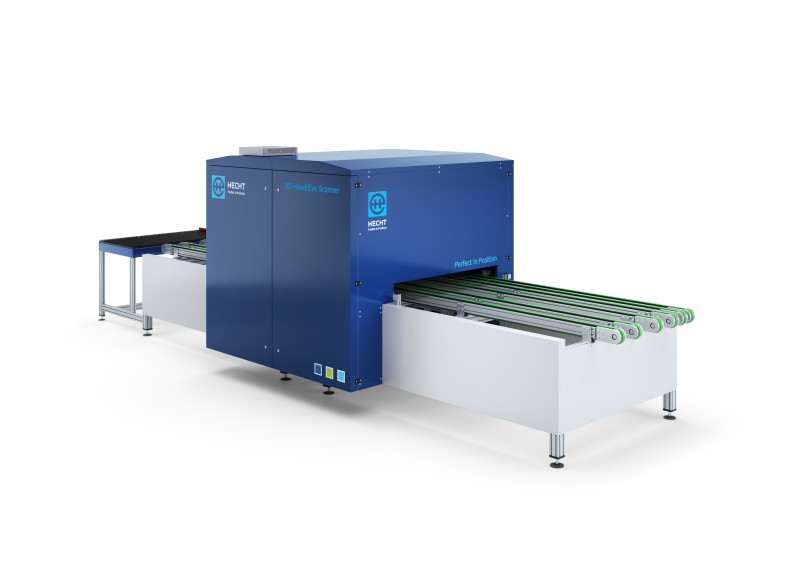
Identify, sort, assign parts with 3D HawkEye scanner

Do you paint fronts and carcase parts? How do you reassign the parts to an order, a job, after painting? Have you ever thought about how nice it would be if you didn't have to pick up each part to determine the dimensions and then search for the corresponding order in a long list?

The process could also look like this: Place part on a conveyor, part passes through a scanner, at the exit a label is printed with the associated order data so the part can be sorted out by an operator. Very simple and tremendously fast. Productivity will skyrocket. How does it work, you ask? The scanner determines the following values: dimension, color, front program or geometry details, which are unique. Based on these values, the part can be clearly assigned to an order / commission. The bottom line is that a time-consuming and costly sorting process is eliminated in the painting process.

Incoming inspection of fronts

100 % measurement in throughput with 4i inline scanner

Do you know the situation when it is discovered during housing assembly that a front is missing or the dimensions/angles are not correct? Then there is a lot of hustle and bustle because the commission has to be redelivered and it takes time for the redelivery from the supplier or the remanufacturing. Most of the time, everything is left undone because the costs are enormous if the order cannot be delivered or can only be partially delivered.

TImagine that all fronts are checked for dimensional accuracy and completeness upon delivery with little effort. If a front is missing or the dimensions are out of tolerance, there is enough time to get a subsequent delivery from the supplier in time. The production process can run stably and the order can be delivered on time. Upon delivery, each front is placed on a conveyor belt and scanned. The measured values are compared with a database and the result is displayed immediately. Manually, the effort and costs involved would be far too high.

Outgoing inspection of finished parts

100 % control on the fly with 4i-Inline Scanner

Do you know this: Angry customers call and complain about a delivery? Parts are missing or cannot be assembled because of missing holes or dimensional deviations. This is very annoying and causes a lot of effort and high costs. If this happens to a customer several times, he looks for alternative suppliers.

Imagine that every component is checked before shipping. A 100 % inspection, i.e. checking the dimensions and angularity, checking the hole pattern and checking the edges and surfaces, ensures that only flawless parts are shipped. This way you can satisfy your customers and convince potential customers to buy from you. Manual 100% inspection is not feasible with today's production volumes. Humans are overwhelmed when they have to find defects over long periods of time and in minimal time per part. Give your organization professional tools and convince customers and employees of your processes.

Check dimensional accuracy and angularity

Manual spot check fast & precise with DesQ II

When approaching edges, it happens again and again that the part dimensions or angles do not correspond to the tolerances.

The more frequently the dimensions and angles are checked, the better the quality and the improvement of the production processes. Direct feedback at the edge bander enables machine operators to find and eliminate the source of the error directly. In the future, these potential errors will be better observed and thus avoided. A simple measuring device, with which a random sample measurement can be carried out quickly and precisely, is the necessary tool for your employees.

Contactform


    Allowed data formats: JPG, PNG, PDF, GIF and ZIP

    Adress

    HECHT AG
    Ottmarsheimer Hoehe
    Heinrich-Hertz-Str. 3-5
    74354 Besigheim